-
Creating Hanging Indents for MLA Works-Cited Pages
-
(Adapted from
http://www.sandhills.edu/english/wordguide/bibliography.html)
-
-
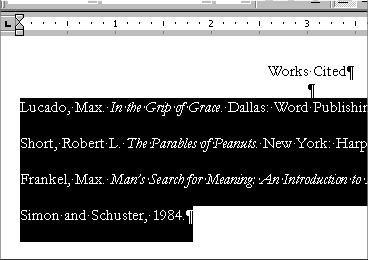
Each entry in a
works-cited page should begin on the left margin, with each
subsequent line of an entry being indented. This is called a
"hanging indent." First use your mouse to drag across the text to be
indented and highlight the text:
Warning! The sample entries in the pictures are in an old MLA
style. Do not use them to see what goes in a 2009 MLA
works-cited entry.
- After you have highlighted all of your works-cited entries,
click Format on the menu bar and then click
Paragraph on the menu. When the Paragraph
dialog box appears, click the button under Special,
and then click the option titled Hanging.
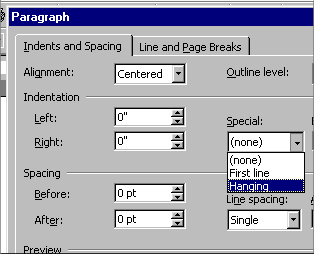
- Click the OK button.
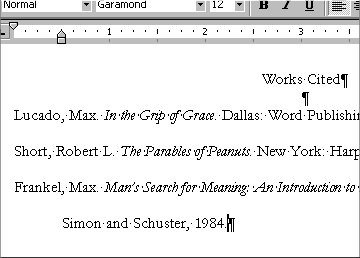
 Each paragraph you type will be indented one-half inch after the
first line of the paragraph, as shown below:
Each paragraph you type will be indented one-half inch after the
first line of the paragraph, as shown below:
Warning! You must use Times New Roman, size 12 font. Do NOT
use Garamond.Alphabetizing Your Works-Cited Page
Note: If you did not type your entries in alphabetical
order, Microsoft Word will automatically alphabetize your
works-cited entries ONLY IF you have typed each of your
works-cited entries as a separate paragraph. Before following the
steps below, be sure you check each of your entries in this manner
to make sure each is a single paragraph: Click the Show/Hide
button—on the Standard toolbar. If you see the
¶ mark on any line that is not the end
of a paragraph, then use your delete key to delete that mark.
The result will be that the following line will be pulled back up
into the same paragraph as the rest of the entry. When you have
finished checking your entries, follow the steps below:
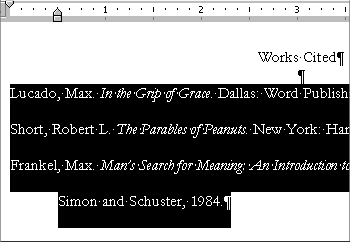
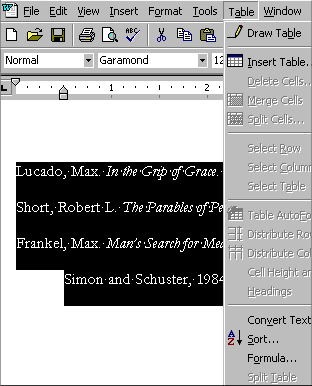
- Use your mouse to select the text in your works-cited page
(all text except your title). Do this by clicking
the first word in the works-cited page and then holding the
mouse button down. Then drag the mouse down to the last word in
the works-cited list of sources:
- Warning! This command will not work if you
have pressed your Enter key after each line of an entry.
- Warning! This command will not work properly
if you have used quotation marks at the beginning of an
entry. If you have, delete the beginning quotation marks and
then after the text has been sorted in alphabetical order,
go back to the entry and add the quotation marks.
- Click Table on the menu bar. When Table
menu appears, click Sort... near
the bottom of the menu.
- When the Sort dialog box appears, click
Ascending. Then click the OK button at the
bottom of the dialog box. Your works-cited page will be
alphabetized by the first word in each entry (if
each entry is a separate paragraph).

- Click any white space in your document to remove the
highlighting from your selected text.
- Note: If you earlier deleted any beginning
quotation marks before the text was sorted into alphabetical
order, go back to the entry and add the quotation marks.
- Click the Save button on your menu bar
 to save the changes in your document.
|